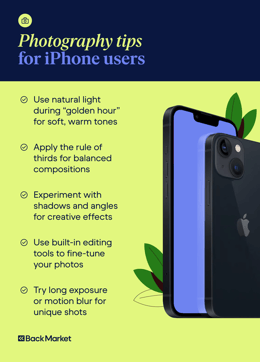
Transform your mobile photoshoots with these iPhone photo tips and tricks.
Capturing high-quality photos has become an integral part of our daily lives. With the advancement of technology, taking stunning pictures is now more accessible than ever before thanks to the iPhone's powerful camera and user-friendly interface. Whether you're a professional photographer or a casual snapper, these iPhone photography tips can help you create beautiful images with ease.
In this article, we'll look at different iPhone photo tips and tricks to help you elevate your mobile photography game. From mastering iPhone camera settings like focus and exposure adjustment to discovering the best iPhone photography apps, you'll learn how to take advantage of your device's capabilities and create visually appealing images.
Whether you're interested in night mode photography, portrait mode tips, or simply want to learn how to take good photos with an iPhone, this guide will provide you with the knowledge and inspiration to capture moments like a pro. So, let's dive in and explore our favourite iPhone camera tips!
Essential iPhone Photography Tips: Mastering the Fundamentals
To take your iPhone photography to the next level, it's important to understand and apply the fundamentals. By mastering these essential techniques, you'll be well on your way to capturing stunning images that stand out from the crowd. In this section, we'll cover three key iPhone photo tips and tricks that will help you create well-composed, perfectly exposed, and high-quality photographs.

1. Use the Rule of Thirds for Improved Compositions
One of the most important iPhone photography tips is to use the rule of thirds when framing your shots. This classic composition technique involves dividing your frame into a 3x3 grid and placing your subject along the lines or at the intersections. By doing so, you create a more balanced and visually appealing image that draws the viewer's eye to the main focal point.
Using leading lines and gridlines for composition makes it easier to apply the rule of thirds. When you enable the gridlines feature in your iPhone's camera settings, a grid overlay will be displayed on your screen, helping to align your subject and other elements accordingly. Experiment with placing your subject off-center or along the lines to create more dynamic and engaging compositions.
2. Leverage HDR for Perfectly Balanced Exposure
High Dynamic Range (HDR) is a powerful feature that can help you capture well-exposed photos in challenging lighting conditions. When enabled, HDR photography takes multiple shots at different exposures and combines them to create a single image with a wider range of tones and details, avoiding overexposure.
To use HDR, open your iPhone's camera app and tap the HDR icon. In most cases, leaving it on "Auto" will suffice, as the camera will automatically detect when HDR is needed. However, if you're shooting extremely high-contrast scenes, such as a bright sky against a dark foreground, you may want to manually enable HDR to ensure a more balanced exposure.
Keep in mind that using HDR may slightly increase the time it takes to capture and process your photos, so it's best to keep your iPhone steady to avoid any blurriness.
3. Optimise iPhone Camera Settings for Maximum Image Quality
To capture the highest-quality photos possible, it's essential to understand and adjust your iPhone camera settings. One of the most important settings to consider is the image format. By default, iPhones capture images in JPEG or HEIC format, which are compressed to save space. However, if you want to maintain the highest level of detail and have more flexibility when editing, consider switching to the RAW format.
To enable RAW capture, you need an iPhone model that supports this feature, such as the iPhone 12 Pro or later. Open the Camera app, switch to the "ProRAW" mode by tapping the "RAW" button in the camera interface, or go to Settings > Camera > Formats and enable Apple ProRAW.
Another setting to keep in mind is the resolution. iPhones automatically capture photos at the highest resolution available, so there is no need to manually adjust this setting. One crucial tip for ensuring the best image quality is to regularly manage your storage, as high-resolution and RAW photos consume significant space. Consider using iPhone photo storage solutions such as Dropbox or iCloud to keep your photos backed up and your device storage optimised.
Capture Stunning Shots in Any Scenario
As an iPhone photographer, you'll encounter a wide range of shooting scenarios, from bright sunny days to dimly lit evenings. By understanding how to adapt to different lighting conditions, like soft light vs. harsh light, and using specialised shooting modes, you can capture stunning shots no matter the situation. In this section, we'll explore five essential iPhone photography tips to help you master any scenario.

4. Harness the Power of Natural Lighting Techniques
One of the most important aspects of iPhone photography is learning how to work with natural light. When possible, shoot during the golden hour – the first and last hours of sunlight – when the light is soft, warm, and flattering. If you're shooting in bright midday sun, look for shade or use your body to cast a shadow on your subject to avoid overexposure and harsh shadows.
When indoors, position your subject near a window to take advantage of soft light. Experiment with different angles and distances from the light source to create various moods and effects. Remember, the key to harnessing natural light is to observe and adapt to the conditions around you.
5. Master the Art of Low-Light Photography with Night Mode
With the introduction of night mode photography, iPhone users can now capture stunning low-light images without the need for a tripod. One of the most useful iPhone photography tips for low-light situations is to use Night mode. When you're shooting in dimly lit environments, your iPhone will automatically suggest using Night mode. Simply tap the Night mode icon, which appears as a moon symbol, and hold your phone steady for a few seconds while it captures multiple exposures and combines them into a single well-exposed image.
To further improve your low-light shots, try using iPhone camera settings like Exposure Adjustment to brighten or darken the image as needed. You can also experiment with long exposure techniques by using a tripod or propping your iPhone up against a stable surface to capture light trails or smooth subjects in motion.
6. Freeze Action with Burst Mode
Capturing fast-moving subjects can be challenging, but with Burst mode, you can freeze action and ensure you never miss a crucial moment. To use Burst mode, simply drag the shutter button to the left (in portrait mode) or down (in landscape mode) while your subject is moving. Your iPhone will rapidly take a series of photos, allowing you to later select the best shots from the sequence.
Burst mode is particularly useful for capturing action shots, such as sports events, wildlife, or energetic children. Additionally, using the AE/AF lock (Auto Exposure/Auto Focus lock) can help maintain focus on moving subjects. To enable AE/AF lock, tap and hold on the part of the screen where you want to focus until "AE/AF Lock" appears. Remember to anticipate the action and start shooting just before the critical moment to increase your chances of capturing the perfect action shot.
7. Create Engaging Panorama Shots with Ease
iPhone's built-in Panorama mode allows you to capture expansive landscapes, cityscapes, and interiors with a single seamless image. To create a panorama, select the Panorama mode in your iPhone's camera app and slowly pan your phone horizontally across the scene. Keep the arrow centered on the guiding line and maintain a steady pace to ensure a smooth and even result.
One of the key iPhone photography tips for capturing the best panorama shots is to find a vantage point that offers a clear, unobstructed view of your scene. A wide-angle lens can help capture even more expansive panoramas. Experiment with different starting points and directions to create unique compositions, and don't forget to capture both vertical and horizontal panoramas for added variety.
8. Discover the Magic of Time-Lapse Videos
Time-lapse videos are a creative way to showcase the passage of time and bring static scenes to life. With your iPhone's Time-Lapse mode, you can easily compress minutes, hours, or even days into short, engaging videos. To create a time-lapse, mount your iPhone on a stable surface or tripod, frame your shot, and tap the record button. Your iPhone will automatically capture frames at set intervals and compile them into a seamless video.
Time-lapses are perfect for capturing subjects like moving clouds, bustling city streets, blooming flowers, or even the setup of an event. Experiment with different intervals and durations to create unique and captivating time-lapse videos that add a new dimension to your iPhone photography.
Elevate Your iPhone Photography with Creative Techniques
While mastering the fundamentals is essential, exploring creative techniques can help you develop a unique photographic style and elevate your iPhone photography. In this section, we'll delve into four creative iPhone photography tips that will inspire you to push the boundaries of your mobile photography.

9. Experiment with Shooting from Different Angles
One of the simplest iPhone camera tips for creating compelling photos is to experiment with unique perspectives. Instead of always shooting from eye level, try crouching down, climbing up, or getting close to your subject. By changing your viewpoint, you can create more engaging compositions that draw the viewer into your image.
For example, shooting from a low angle can make your subject appear larger than life, while shooting from a high angle can provide a unique bird's-eye view. Don't be afraid to get creative with your perspectives—lie on the ground, climb a ladder, or even use a selfie stick and a self timer to capture shots from unusual angles.
10. Transform Portraits with Depth Control in Portrait Mode
One of the most powerful iPhone photography tips is to use Portrait mode, a setting for creating stunning, professional-looking portraits. By using advanced depth-sensing technology, Portrait mode allows you to capture photos with a sharp foreground subject and a beautifully blurred background, simulating the look of a DSLR camera. A zoom lens can also help achieve a shallow depth of field effect.
To take your Portrait mode photos to the next level, experiment with Depth Control. This feature allows you to adjust the strength of the background blur after you've taken the photo. Simply open your portrait in the Photos app, tap "Edit", and use the Depth Control slider to increase or decrease the blur effect. This gives you greater creative control over your portraits and helps you achieve the perfect look for each image.
11. Capture Moments in Motion with Live Photos Tips
Live Photos is a unique iPhone feature that brings your still images to life by capturing a few seconds of video and audio before and after you press the shutter button. When viewed, Live Photos animate and play sound, creating a more immersive and engaging experience.
To create a Live Photo, simply ensure the Live Photos icon (concentric circles) is enabled in your iPhone's camera app. When you press the shutter button, your iPhone will capture a short video clip along with your still image. You can later apply fun effects like Loop, Bounce, or Long Exposure to your Live Photos to create unique and eye-catching animations.
12. Create Compelling Narratives with Photo Series and Collages
Telling a story through your iPhone photos is a powerful way to engage your audience and create a lasting impact. One effective technique is to create a photo series, which is a collection of images that work together to convey a specific theme, emotion, or narrative. By curating a series of photos, you can guide your viewers through a visual journey and evoke a stronger emotional response. Using reflections in your series can add depth and intrigue.
Another creative technique is to make photo collages using iPhone photo editing apps. Collages allow you to combine multiple images into a single, cohesive composition, showcasing different perspectives, moments, or details of a scene. Experiment with various layouts, grids, and styles to create visually striking collages that tell a compelling story. Minimalist photography can work especially well for collages.
By applying these creative iPhone photography tips, you'll be able to craft unique and engaging images that stand out from the crowd. Remember, the key to growth as an iPhone photographer is to continually experiment, learn, and push yourself out of your comfort zone.
Expand Your iPhone Photography Arsenal
While the iPhone's built-in camera app offers a wide range of features and capabilities, expanding your photography toolkit with iPhone accessories and apps can help you take your mobile photography to new heights. In this section, we'll explore three essential iPhone photography tips to help you expand your toolkit and continuously improve your skills.

13. Must-Have Editing Apps for iPhone to Enhance Your Photos
Post-processing is an essential part of the iPhone photography workflow, allowing you to fine-tune your images and add creative touches. There are countless editing apps for iPhone available, each with its own unique features and tools. Some must-have apps include:
Snapseed: A powerful, free app by Google that offers a wide range of editing tools, from basic adjustments to advanced filters and selective edits.
VSCO: Known for its beautiful, film-inspired presets, VSCO is a favourite among iPhone photographers looking to create a consistent, stylized look.
Lightroom Mobile: Adobe's mobile version of the popular desktop software, Lightroom Mobile, offers professional-grade editing tools and cloud syncing for a seamless workflow.
When editing your iPhone photos, start with basic adjustments like exposure, contrast, and colour temperature, then experiment with more creative edits like selective adjustments, HDR effects, or black and white photography. Remember, the key is to enhance your photos without overediting or losing the original essence of the image.
14. Essential iPhone Photography Accessories to Elevate Your Game
While the iPhone is a capable camera on its own, investing in a few key accessories can help you achieve even better results and expand your creative possibilities. Some essential iPhone photography accessories include:
External lenses: Attachable lenses like wide-angle, macro, and telephoto can help you capture unique perspectives and details that aren't possible with the iPhone's built-in lenses.
Tripod: A sturdy tripod is essential for low-light photography, long exposures, and self-timer shots. Look for a compact, portable tripod that's easy to carry with you on your photography adventures.
Remote shutter: A remote shutter allows you to trigger your iPhone's camera from a distance, making it perfect for group shots, self-portraits, or long-exposure photography.
Mobile photography kit: A comprehensive collection of mobile photography accessories often includes a variety of lenses, a tripod, a remote shutter, and other useful equipment in a compact, portable package. You can enhance flash photography with external flash accessories for your iPhone.
When choosing iPhone photography accessories, consider your specific needs and shooting style. Invest in high-quality, durable accessories that will withstand regular use and help you capture the best possible photos.
15. Continuously Improve Your Skills with Online iPhone Photography Courses
One of the most effective iPhone photography tips for continuous improvement is to invest in your education and develop your skills and techniques. Online iPhone photography courses offer a convenient and affordable way to learn from experienced photographers and take your skills to the next level.
Platforms like Skillshare, Udemy, and CreativeLive offer a wide range of iPhone photography courses covering topics like composition, lighting, editing, and specific genres like travel photography, product photography, or astrophotography. Many courses are self-paced, allowing you to learn at your own speed and fit your education into your busy schedule.
In addition to courses, consider joining iPhone photography communities on social media platforms like Instagram, Facebook, or Reddit. These communities are great places to share your work, get feedback from other photographers, and learn new iPhone photo tips and tricks.
By continuously investing in your education and expanding your iPhone photography arsenal with must-have apps and accessories, you'll be well-equipped to take your mobile photography to new heights and capture stunning photos in any scenario.
Now that you've learned a wide range of iPhone photography tips, techniques, and tricks, it's time to put your knowledge into practice. Keep in mind that you don't need to buy a new iPhone to capture stunning photos. Refurbished iPhones offer the same advanced camera features and capabilities as newer models at a more affordable price point, which makes them an excellent choice for budget-conscious photography enthusiasts.
Start by setting aside dedicated time to shoot with your iPhone, experimenting with different subjects, lighting conditions, and creative techniques. As you capture photos, regularly review your work and identify areas for improvement. Don't be afraid to step out of your comfort zone and try new iPhone photo tips and tricks, like using external lenses or exploring unique angles. When you're ready to upgrade your gear, consider exploring refurbished iPhones from trusted marketplaces like Back Market to expand your photography arsenal without overspending.
The keys to mastering iPhone photography are practice, patience, and persistence. With these actionable steps and your newfound knowledge of how to take good photos with iPhones, you'll be well on your way to capturing stunning, Instagram-worthy pics. Whether you're using a brand new iPhone or a refurbished model from Back Market, you have the tools and knowledge needed to create incredible images. So grab your iPhone, get out there, and start shooting—the world is waiting to be captured through your lens!
Ready to take your iPhone photography to the next level? Explore Back Market's selection of refurbished smartphones today.


